
The size of my purse organizer is approx. 28cm x 19cm x 8cm. As I said in my last post, the pattern is based on A4 sheets:

A = front and back panel: A4 sheet, cut 4x
B = side panel: 21cm(=short side of A4 sheet) x 10cm, cut 4x
D = bottom panel: 29,5cm(=long side of A4 sheet) x 10cm, cut 2x
C = low pockets: 29,5cm(=long side of A4 sheet) x 12cm, cut 2x on fold
E = high pockets: 29,5cm(=long side of A4 sheet) x 15cm, cut 2x on fold
You can choose the height of the pockets as you want, I decided to go with two different heights (12 and 15cm). You can also only choose one height (then skip E, and cut C 4x). Depending on the strength of your fabric, you might want to add some kind of interfacing.
I decided to have pockets on the inside and outside of the purse organizer, so I started with the parts A, C and E. On each right side of A I laid either a C or E piece (which were cut on the fold). To get the pockets, I divided by half when using E, and divided in three when using C. Then I sewed the pieces together using a zig-zag stitch.

(If you want, you can add pockets to your side panels (B) as well. Cut a 10cm wide piece on the fold in the height you’d like to have.) Then I took 2 two pieces of B, one piece of D, one A/E piece and one A/C piece and sewed it together to have a big piece like in the following illustration:

In my next step I sewed the side seams together, followed by the bottom seams. Now I had my first boxy piece for the inside of my organizer. After repeating with the remaining two pieces of B, the bottom piece D and the other A/E and A/C piece, I had the second boxy piece for the outside of my organizer.
Now you have different possibilities to get the inside and outside parts together. I chose to face both parts right sides together (wrong sides showing to the outside) and sewing both pieces together leaving an opening big enough to turn the right sides outside afterwards. Then I closed the opening with a zig-zag-stitch which I continued all around the purse organizer. If you want to add a flap or a key chain, don’t forget to attach them BEFORE sewing both parts together.
Another possibility is to face both parts wrong sides together with the right side already showing to the outside and add bias binding to the top of the bag (e.g. nicely explained with this tote bag). Or you fold (iron) the top of each part 1 cm down, put both parts wrong sides together again, pin in place and topstitch together (I hope you get what I mean…).
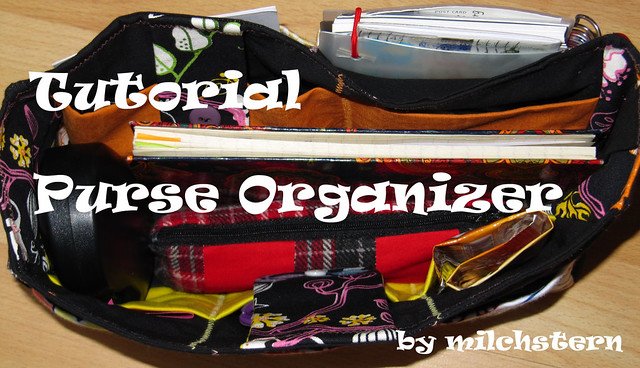
I’m sorry I’m not able to show you work-in-progress pictures and I hope that my illustrations will be helpful. If there is any question, go ahead and ask. Maybe a look at the finished organizer might help as well:


Printing now! Thanks so much for taking the time to prepare diagrams and write instructions! Very much appreciated!
You’re welcome!
Hi again – I haven’t had a chance to whip one of these up yet…but thought you might find this free pattern for a purse organiser from Hot Patterns interesting…
See: http://www.hotpatterns.com/free-download-candy-girl-purse-organizer/?utm_source=Valentine%2FCandy+Girl+Feb+13+1013&utm_campaign=valentine%2Fcandy+girl&utm_medium=email
(let me know if you have trouble with this link….it’s from an email I received from Hot Patterns today…I can forward the email, if you’d like)
[…] fingers were itching to sew something quick and easy and this organizer fit the bill. I followed this tutorial at Milchstern and it was a snap. Even with cutting out pattern pieces, I had this baby finished in an afternoon […]
where is the handled?
A handle was not neccessary for me – it works fine without. But if you want one, you can easily add one before sewing the outer and inner part of the bag together.
Thank you so much for this. I have just spent the last 30 mins or so cruising around the web looking for JUST this, that wasn’t $30-$40.
You’re welcome! I’m glad you like the tutorial.
[…] than mine. It needed to be less high and she did not want as much pockets as I have. I used my own tutorial, and omitted sheet A and used E instead. I adjusted the height of B accordingly and was using sheet […]
Very useful article. Thank you so much.
Thank you so much for posting this tutorial. I’ve just finished making myself one after finding your blog a few days ago. It’s fabulous. Many thanks for sharing your work. Best wishes
I made this at the weekend and love it! I took it to work and a colleague asked if I could make her one, then another etc! Do you have a policy on people selling your design? I’ve never made things to sell before but this was VERY popular!
Thanks for asking. I do not have a real policiy, but as long as you sew the organizer for yourself and some friends, I’m totally fine. But I would not appreciate if you would sew the organizer according to the tutorial and then sell it to random people for profit.
Thank -you for getting back to me! My friend loved the organiser!
Thank you so much for posting this. As a mother of 5 daughters I really did not want a typical diaper bag/mommie bag. So this will come in handy inside a beautiful tote.
You’re welcome! I’m glad you like it and that it can be used for so many purposes.
Thank you for the tutorial. I was wondering how much fabric and interfacing did you use to make the purse organizer?
[…] organizador de carteras es una variación del que en el blog Made by Milchstern. Quise hacer esto porque tengo varias amigas que pasan un buen rato buscando cosas en las […]
Hello from Argentina !I just saw your tutorial !Thanks for sharing this Purse Ofganizer, just right what I was looking for. It’s lovely !!!! It’s for personal purpose, so I hope you don’t mind I print the pattern! Regards.
Hello Maria. I am happy that you like the tutorial. I don’t mind that you print the pattern if it is for personal use. Have fun sewing!
Hi Miriam,
I like this design. I’m a little confused on how to make the bag without seams showing on the inside of the bag. Did you make the inside of the bag separately from the outside of the bag and then sew the exterior and interior bags together? Thanks for the help. I’m not a particularly skilled sewer.
[…] som framsida och mindre delar av arket till fickor, sidostycken och botten. Här finns inlägget. Klick. Ganska smart. Min blev nu inte riktigt som den här. Storleken passade inte min väska, så jag […]